Winter is just around the corner! With that being said, I’d like to blog a project that Wendy and I have been working on.
One of our most treasured household possessions is our Woodstock Soapstone Stove. This wonderful work of craftsmanship keeps our entire house toasty warm during the bitterest of temperatures. We do of course have electric heat in our house but there is never a need to use it. It’s quite humorous to look at our electric bill in graph form for the year, the winter months show nominal usage but the summer peaks due to the air-conditioner.
After deciding to put in a chimney & get a wood-burning stove, I must give Wendy the credit for choosing a Woodstock Soapstone, and what a wise decision it turned out to be. She thoroughly researched the subject on the internet pouring through tons of consumer reviews before presenting me with the options. She found that the Soapstone retained and radiated heat better than any material out there. She also found that the Woodstock Company equipped their stoves with a converter mechanism that could be engaged at a particular temperature. This feature recycles smoke and gases that would otherwise escape up the chimney back into the stove providing much longer burn times from a load of wood. Burn times up to 12 hours in fact.
After requesting a catalog from them, we decided on the “Fire-view” model. We liked the look of this particular stove as well as the fact that it had a window on the front enabling us to enjoy the ambience of having a fire. The stove was so heavy we had to make special arrangements with a local business which had a loading dock for delivery. Getting it into our house required the assistance of our Neighbor’s tractor.
Last year was the first test of our new Soapstone Stove and boy did it pass with flying colors. We just about had a fire going for five months straight with a couple of exceptions to give the thing a good cleaning. We would burn it all day long, load it up before we went to bed at night and turn down the air intake so it would “simmer”. In the morning, all I had to do was flip the lever to give it oxygen and within a minute, I’d have a roaring fire again. About this time, the boys would all wake up and sprawl out on the floor beside the stove and begin their day of home-school.
We did have one serious concern regarding the stove. The wall behind it where the stovepipe passed through seemed a bit too warm for our liking. This concern prevented us from feeling “Totally” comfortable with the unit. So before the season is upon us again, we decided to address this issue and the aesthetic appearance as well. Which brings us to our project…
Pix – 1 – – > This was our stove setup last year.
Pix – 2 — > Cut the wall out… the terracotta pipe is the culprit for radiating heat passing to the chimney(See all the flamable material around it?). This in our minds, was a possible fire-hazard. The fireplace company we contracted to do the work agreed.
Pix – 3 — > Cut the wall out completely, applied some mortar to create a flat surface to install the Insul-Flu.
Pix – 4 — > Insul-Flu installed around terracotta pipe. No heat shall threaten the wood around it now.
Pix – 5 — > Fire-proof Cement board replaces pre-existing dry-wall.
Pix – 6 — > Wire mesh is nailed to cement board – a “scratch coat” of cement is applied.
Pix – 7 — > Mason is applying stone to the board.
Pix – 8 — > Stonework is completed.
Pix – 9 — > Mortar is applied between the stones.
Pix – 10 — > Mantle installed.
Pix – 11 — > Stove re-installed…Finished Project

 Just 60 days left until we get treated to the next Harry Potter movie. I’m holding out high expectations for this flick because it’s one of the best books of the series so far.
 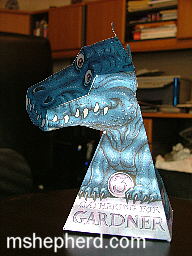 Look at this cute little dragon I made! Phyllis sent me the link and I printed him, cut & folded him.
 Whew! what an exhausting but fun day. Timothy had his 10th birthday today & the theme was Pirates! Each time one of our boys has a Birthday, Wendy will ask them what kind of party they wish to have. Usually they will choose Starwars, Lord of The Rings, or even Harry Potter. However, Timothy has been hooked on a computer game I bought called Sid Meier’s Pirates and made his choice. I must say, it made for some interesting entertainment and activities.
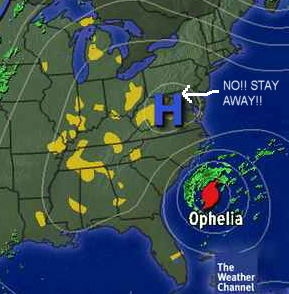 (Singing)…
  I’m sending this one out to my “Home-Slice” Phyllis who recently valiantly attempted to send me a funny along the same lines… Sadly, the attachment didn’t forward and she had cleaned her browser cache.
 As I pumped $41.00 worth of 87 octane fuel into my Nissan Altima before work today, this image that